Nessun prodotto
BLOG NEWS
 USARE UN DISPLAY LCD 16x2 CON LA IOT PROTO SHIELD PLUS
  Cosa ne pensa Paolo Aliverti della IoT Proto Shield Plus?
  USARE UN DISPLAY OLED SSD1306 128X64 CON LA IOT PROTO SHIELD PLUS
  USARE UN DISPLAY OLED SSD1306 128x64 CON LA IoT PROTO SHIELD PLUS
  Il Bus I2C sulla IoT Proto Shield Plus
 Search on blog
Follow us on facebook
I più venduti
-

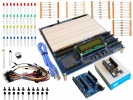
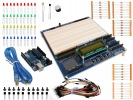
Proto Shield Plus STARTER KIT
Questo kit è rivolto principalmente a chi desidera iniziare a...
69,90 € -

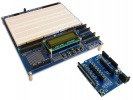
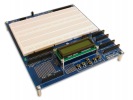
Proto Shield Plus LCD KIT
La scheda PROTO SHIELD PLUS rende comodo ed immediato sperimentare e...
56,00 € -

Adattatore da SMD a piastra sperimentale (confezione 10pz)
Adatta facilmente componenti SMD a piastra sperimentale (breadboard) con...
3,90 € -

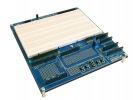
Proto Shield Plus KIT BASE
La scheda PROTOSHIELD PLUS rende comodo ed immediato sperimentare e...
52,00 €
Using the MKR2UNO Plus with the PROTO SHIELD Plus
Published : 17/10/2019 00:00:10
Categories : Proto Shield Plus
Using the MKR2UNO Plus with the PROTOSHIELD Plus

If you want to use the MKR2UNO Plus on the PROTOSHIELD Plus, you have to consider:
- On the PROTOSHIELD Plus D11 connects by default to RED LED and it will conflict with MKR11 pin which acts as SDA pin to establish I2C communication with PCF8254 LCD driver
- On the PROTOSHIELD Plus D12 connects by default to GRN LED and it will conflict with MKR12 pin which acts as SCL pin to establish I2C communication with PCF8254 LCD driver
- To let the pushbuttons resistive network work properly you need to set Vbrd of the PROTOSHIELD Plus to 3,3V
Disconnecting RED and GRN leds from D11 and D12
On the PROTOSHIELD Plus GRN LED connects by default to digital pin 12 (by means of SJD12).
On the PROTOSHIELD Plus RED LED connects by default to digital pin 11 (by means of SJD11).

OUTPUT LEDs on the PROTOSHIELD Plus

OUTPUT LEDs connection on the PROTOSHIELD Plus

SJD12 and SJD11 on the PROTOSHIELD Plus
Cut SJD12 and SJD11 (see above image) in the middle to disconnect D11 and D12 pins from the OUTPUT LEDs.
Setting Vbrd of the PROTOSHIELD Plus to 3,3V
Locate SJBRD on the bottom of the (see below image).
As you can see, SJVBRD connects by default to 5V.

Bottom view of the PROTOSHIELD Plus

SJVBRD on the bottom side of the PROTOSHIELD Plus
To set Vbrd to 3,3V, you have to cut the default connection to 5V and connect it to 3V3 with a little drop of tin (see Figure 34).

Configuring SJVBRD to set 3,3V Vbrd on the PROTOSHIELD Plus
Testing the APSP_demo_MKR1000 sketch
Download the APSP_demo_MKR1000 sketch by clicking here.
This sketch makes use of D2 and D3 to drive GRN end RED LEDs, so if you want to see them light up, you have to follow the instructions on the PROTOSHIELD Plus User Manual chapter 10.1.
Related products

Introducing the new MKR2UNO Plus board
Read more
Published : 16/12/2018 16:30:08
Getting the MKR2UNO Plus out of the box
Read more
Published : 24/02/2019 17:18:51
The Proto Shield Plus Board Layout
Read more
Published : 09/03/2018 10:45:38