No products
BLOG NEWS
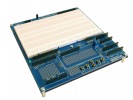
 USING A 16x2 LCD DISPLAY WITH THE IoT PROTO SHIELD PLUS
  What does Paolo Aliverti say about the IoT Proto Shield Plus?
  USING AN SSD1306 128x32 OLED DISPLAY (I2C type) WITH THE IoT PROTO SHIELD PLUS
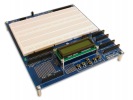
  USING AN SSD1306 128x64 OLED DISPLAY (I2C type) WITH THE IoT PROTO SHIELD PLUS
  I2C Bus on the IoT Proto Shield Plus
 Search on blog
Follow us on facebook
Top sellers
-

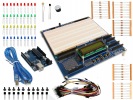
Proto Shield Plus STARTER KIT
This kit is the ideal solution for those who want to start to prototype...
69,90 € -

Proto Shield Plus LCD KIT
Prototype with ARDUINO / GENUINO boards without having a lot of wires...
56,00 € -

SMD to breadboard adapter (10 pcs pack)
Easily adapt SMD devices to 2.54mm prototyping breadboards.
3,90 € -

Proto Shield Plus BASE KIT
Prototype with ARDUINO / GENUINO boards without having a lot of wires...
52,00 €
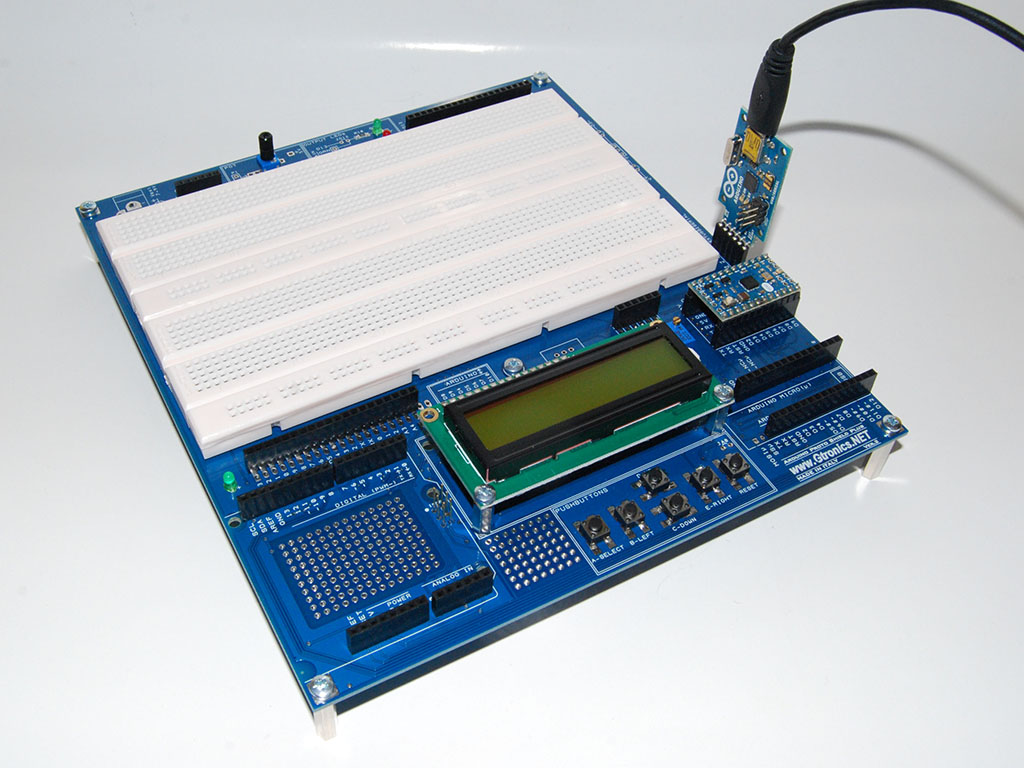
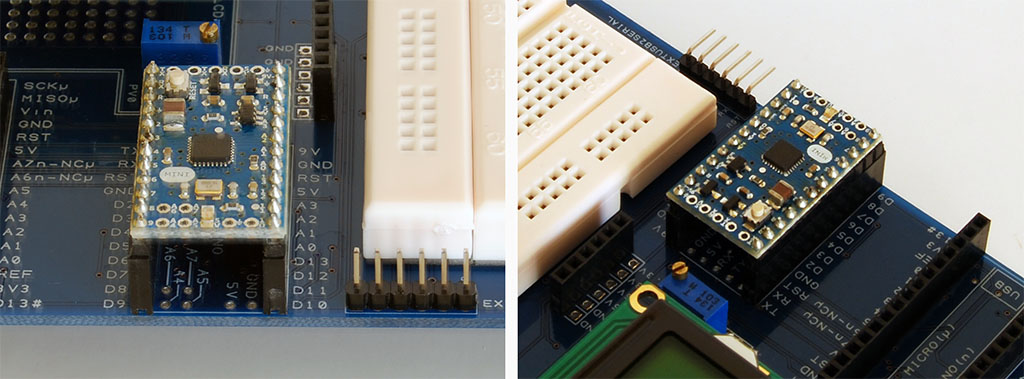
Using the Proto Shield Plus with Arduino MINI
Published : 03/21/2018 22:38:23
Categories : Proto Shield Plus
Using the Proto Shield Plus with Arduino MINI
The MINI board needs an USB to serial adapter to communicate with the IDE.
The Proto Shield Plus comes by default with the 0,1uF capacitor needed by the USB to SERIAL adapters to reset Arduino while uploading sketches (see C8 on the Proto Shield Plus).
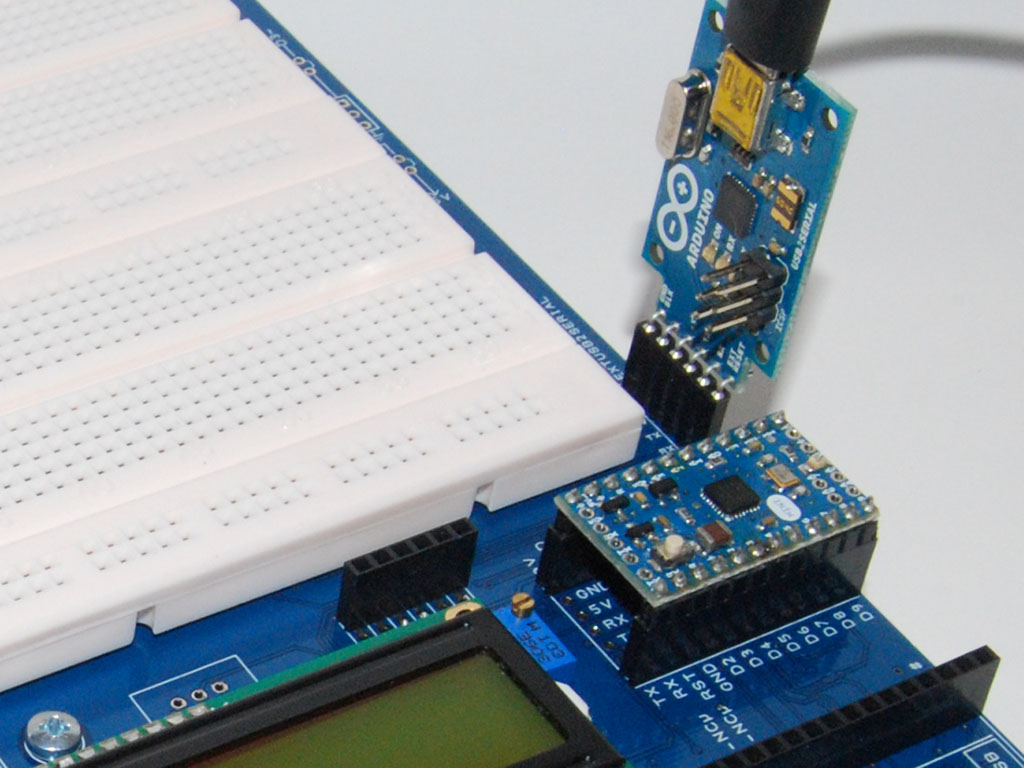
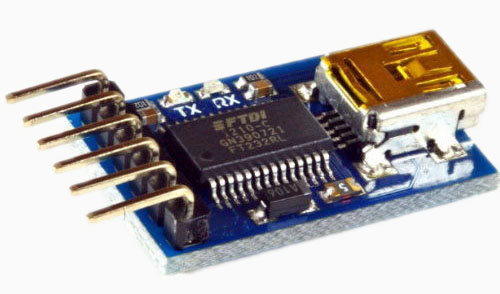
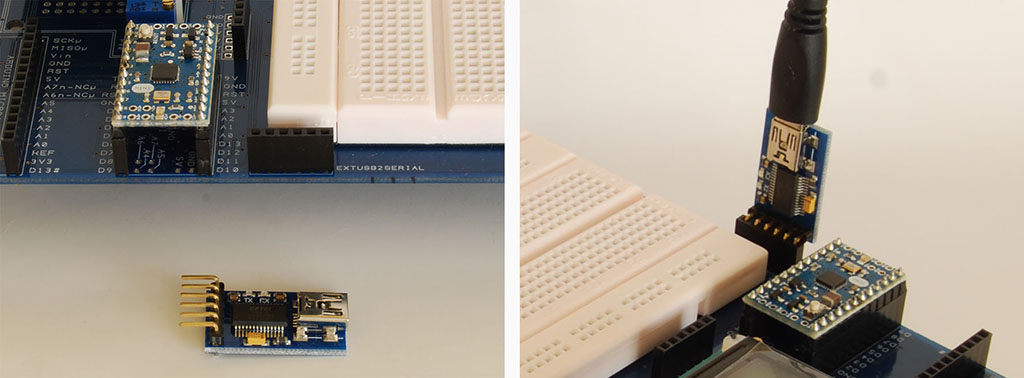
Using the official USB2SERIAL LIGHT adapter to work with Arduino MINI
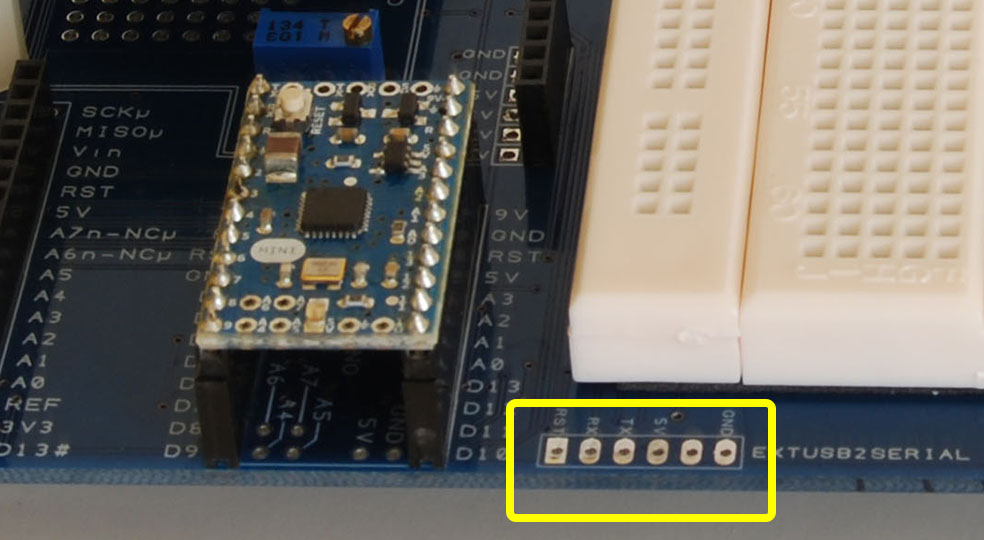
The USB2SERIAL LIGHT adapter must be connected to the EXTUSB2SERIAL SOCKET of the Protoshield Plus.
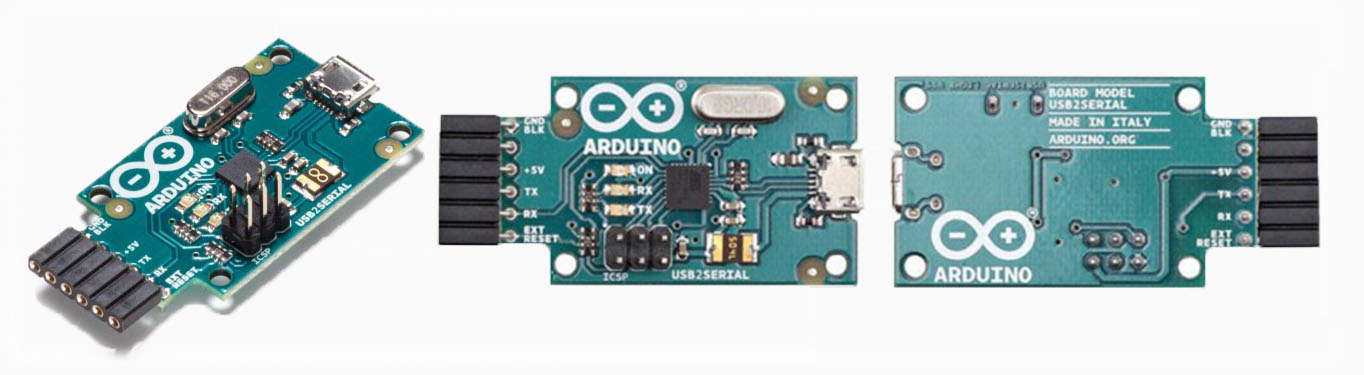
To plug the USB2SERIAL LIGHT adapter into the board, choose the solution that better fits your needs.
Using a female header
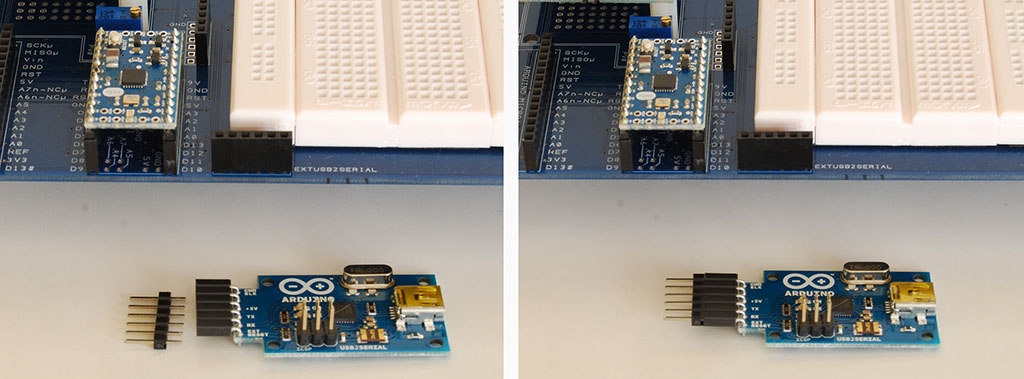
Using a male header
Horizontal or vertical mount
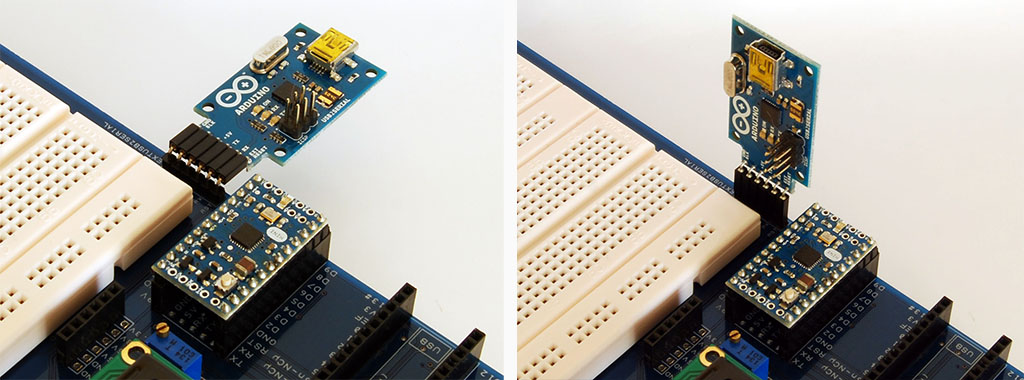
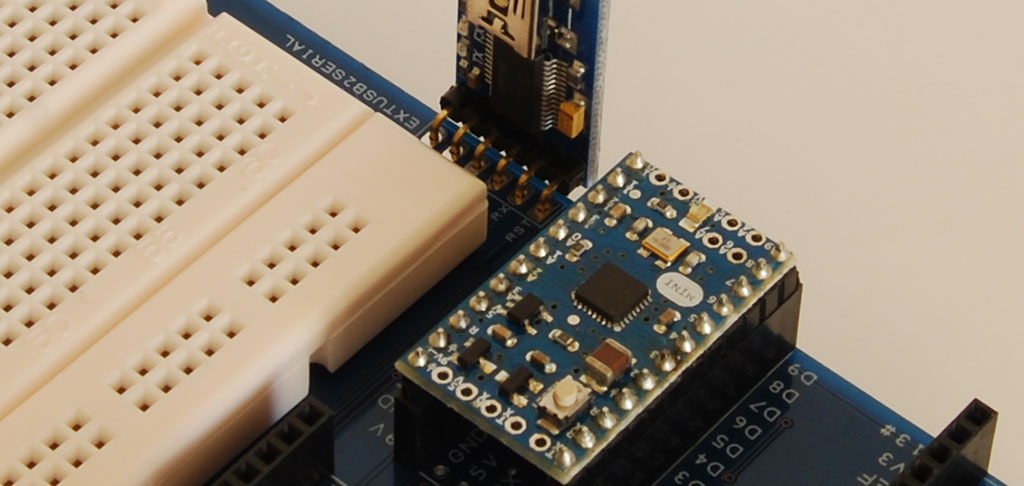
Using third-party USB to SERIAL adapters to work with Arduino MINI
The USB to SERIAL adapter must be connected to the EXTUSB2SERIAL SOCKET of the Proto Shield Plus.
To plug the USB to SERIAL adapter into the board, choose the solution that better fits your needs.
Using a female header
Even if it is not recommended, you can soldering directly into the socket.
Turning an Arduino UNO board into an USB to SERIAL adapter
First you need an Arduino UNO board with the ATmega328 28 pins DIL package (not the SMD version).
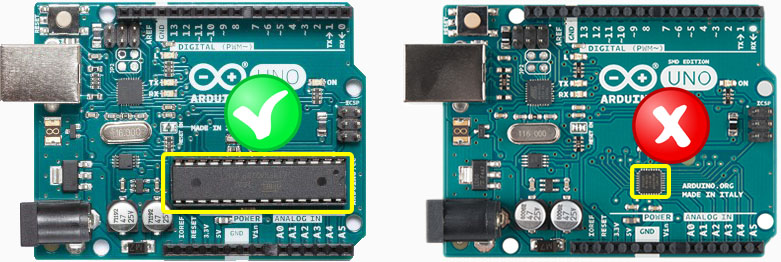
- Remove the ATmega328 chip from its socket
- Plug the UNO board into the Proto Shield Plus
- Now the UNO board performs the communication with the Arduino MINI
- Open Arduino IDE
- Select “Arduino MINI” from Tools -> Board menu
- Select the COM port associated to the UNO board from Tools -> Port menu (since it will be the serial communication channel)
Swapping TX / RX signals
By default TX and RX signal are connected in CROSSED configuration.
This means:
RX pad on the EXTUSB2SERIAL connector connects to the Arduino MINI TX pin (SJTX2RX is closed).
TX pad on the EXTUSB2SERIAL connector connects to the Arduino MINI RX pin (SJRX2TX is closed).
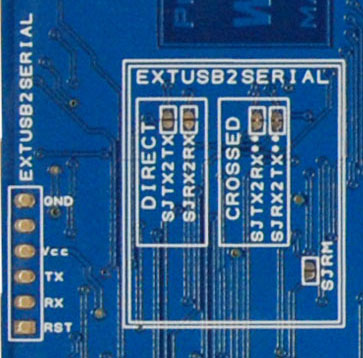
If for some reason, due to third-party USB to SERIAL adapter, you need swap the two signals:
- Open SJTX2RX and SJRX2TX (by cutting them in the middle)
- Close SJTX2TX and SJRX2RX

The Proto Shield Plus Board Layout
Read more
Published : 03/09/2018 10:45:38