No products
BLOG NEWS
 USING A 16x2 LCD DISPLAY WITH THE IoT PROTO SHIELD PLUS
  What does Paolo Aliverti say about the IoT Proto Shield Plus?
  USING AN SSD1306 128x32 OLED DISPLAY (I2C type) WITH THE IoT PROTO SHIELD PLUS
  USING AN SSD1306 128x64 OLED DISPLAY (I2C type) WITH THE IoT PROTO SHIELD PLUS
  I2C Bus on the IoT Proto Shield Plus
 Search on blog
Follow us on facebook
Top sellers
-

Proto Shield Plus STARTER KIT
This kit is the ideal solution for those who want to start to prototype...
69,90 € -

Proto Shield Plus LCD KIT
Prototype with ARDUINO / GENUINO boards without having a lot of wires...
56,00 € -

SMD to breadboard adapter (10 pcs pack)
Easily adapt SMD devices to 2.54mm prototyping breadboards.
3,90 € -

Proto Shield Plus BASE KIT
Prototype with ARDUINO / GENUINO boards without having a lot of wires...
52,00 €
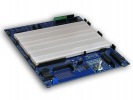
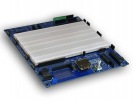
The Onboard Level Shifter of the IoT Proto Shield Plus
Published : 04/08/2022 11:14:39
Categories : IoT Proto Shield Plus , Proto Shield Plus
The onboard Level Shifter of the IoT Proto Shield Plus
Since ESP NANO33 boards works with 3V3 operating voltage (see 5V and 3V3 on the IoT Proto Shield Plus), you may need to convert 5V to 3V3 or vice versa.
You can do this level shifting using the 4 onboard level shifter of the IoT Proto Shield Plus.
The onboard level shifter is a copy of the well known level shifter module of widespread use.
The level shifter provides HV (HighVoltage) and LV (LowVoltage) connections (see schematics below).
The level shifter converts an HV voltage signal into LVin voltage signal and, vice versa, it converts a LV voltage signal into an HVin voltage signal.
By default, HVin connects to 5V (by means of JP41) and LVin connects to 3V3 (by means of JP42).
LEVEL SHIFTER Section of the IoT Proto Shield Plus 

Schematic of the IoT Proto Shield Plus LEVEL SHIFTER Section 
Using the level shifter is very easy:
- any 5V signal connected to an HVx pin, will be converted into a 3V3 signal on its corresponding LVx pin
- any 3V3 signal connected to a LVx pin, will be converted into a 5V signal on its corresponding HVx pin
Using the onboard level shifter with different HVin and / or LVin
If you need to use the onboard level shifter with different HVin, you must disconnect JP41 pad #1 from pad #2 (cut in the middle) and connect JP41 pad #2 to pad #3 (with a little drop of tin).
Now you must provide your desired HVin to J16 pin #3 header.
JP41 and J16 pin#3 of the Level Shifter section of the IoT Proto Shield Plus
If you need to use the onboard level shifter with different LVin, you must disconnect JP42 pad #1 from pad #2 (cut in the middle) and connect JP42 pad #2 to pad #3 (with a little drop of tin).
Now you must provide your desired LVin to J18 pin #3 header.
JP42 and J18 pin#3 of the Level Shifter section of the IoT Proto Shield Plus
Related products


5V and 3V3 on the IoT Proto Shield Plus board
Read more
Published : 02/04/2022 08:40:16
Introducing the new IoT Proto Shield Plus
Read more
Published : 11/11/2021 08:34:28
Plug & Play modules on the IoT Proto Shield Plus
Read more
Published : 01/13/2022 15:43:02
The IoT Proto Shield Plus Layout
Read more
Published : 12/17/2021 09:12:04
Using the IoT Proto Shield Plus with Arduino and ESP boards
Read more
Published : 02/11/2022 08:36:34